
 1012
1012
Overview
When a client chooses to pay their scheduled membership payment in cash instead of through their usual online payment method, you can manually process this easily in Hapana Core. This guide will walk you through how to apply the cash payment correctly to their profile to keep billing records accurate.
Prerequisites
- Access to your Hapana Core account.
- Ensure the cash payment has been received from the client before processing.
1. Log in to your Hapana Core Account
- Go to https://core.hapana.com/login.
- Enter your credentials and log in.
2. Click Clients
- From the main navigation bar, click Clients to access the client list.

3. Search for the desired Client
- Use the search bar to find the client by name, email address, barcode, or phone number.
4. Open the Client Profile
- Click the client’s Name to open their profile.

5. Navigate to the Memberships Tab
- In the client’s profile, select the Payment tab (card icon)

- Then go to the Memberships tab to view active packages and payments.

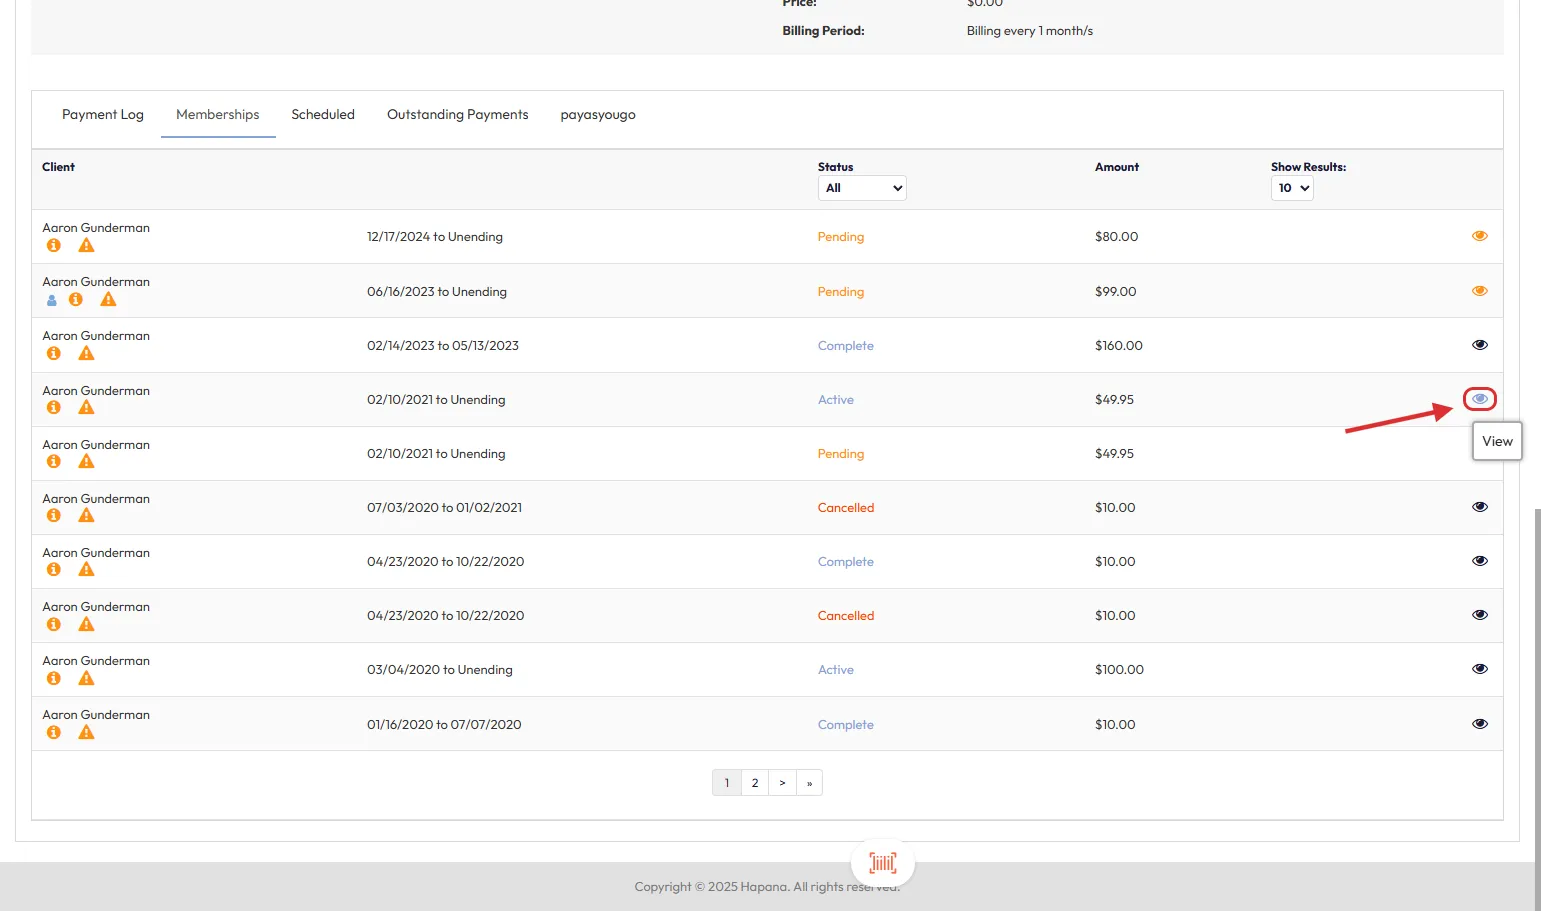
6. Click the Eye Icon for the Relevant Membership
- Locate the correct membership associated with the scheduled payment.
- Click the eye icon to view the membership details.
7. Click the Card Icon Next to the Scheduled Transaction
- In the Payment Schedule, find the transaction you need to process.
- Click the card icon to the right of the transaction.
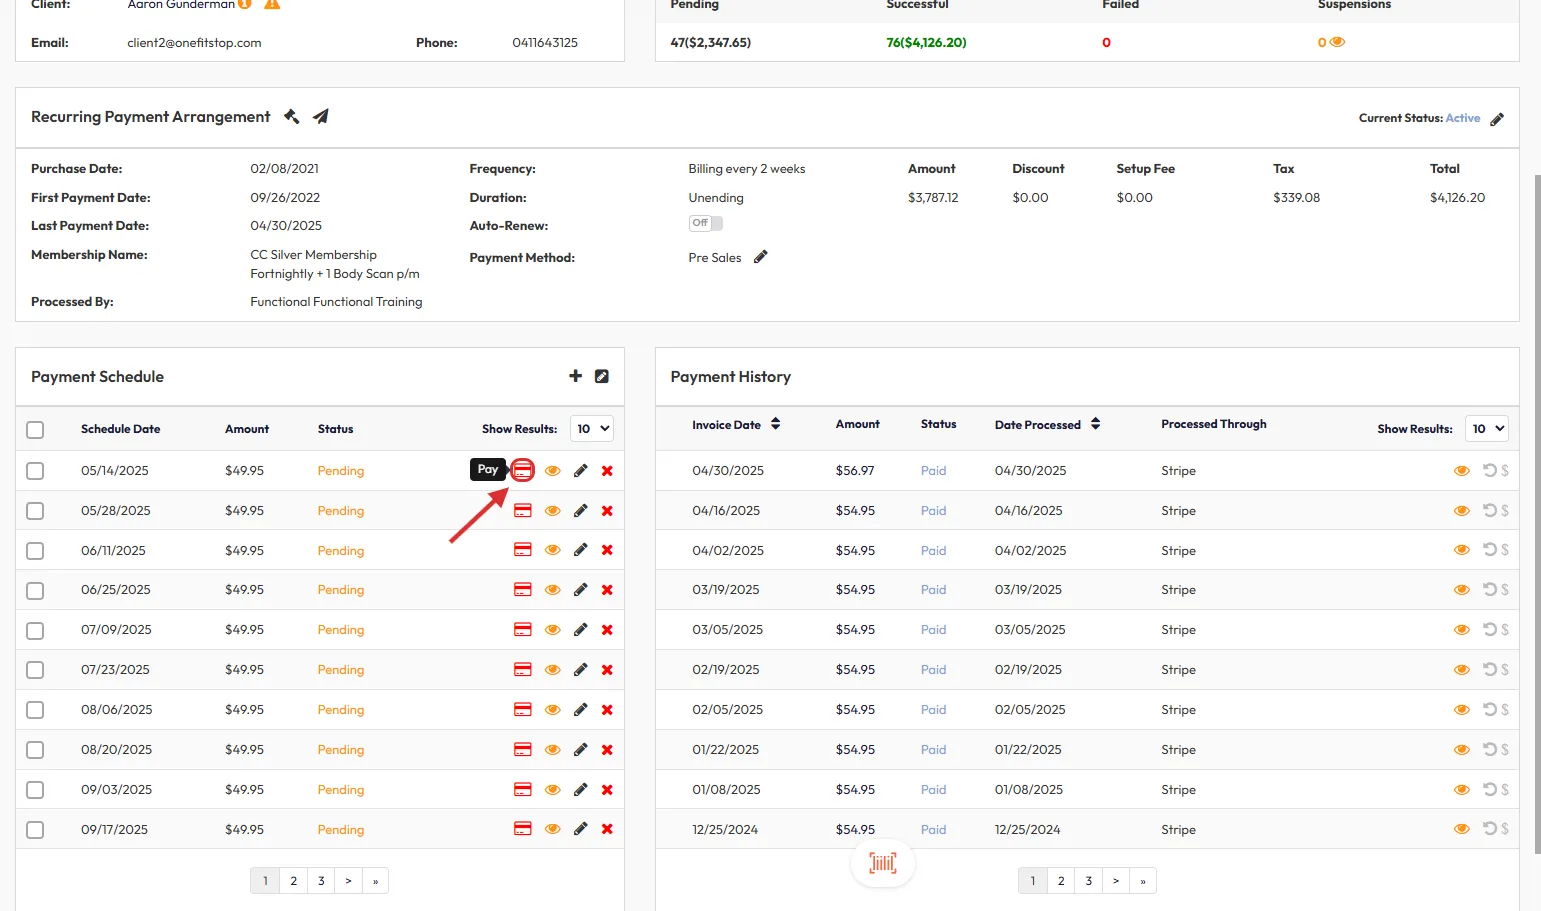
Tip: Look for transactions that are showing as Pending under the Status column.
8. Select Cash from the Method of Payment Menu
- A checkout window will open.
- Select Cash as the payment method.

9. Enter the Cash Received Amount
- Enter the full cash amount received in the Cash Received field.
- The system will automatically calculate and display any Change Required if applicable.
10. Click Confirm Payment
- Click Confirm Payment to finalize the transaction.

11. View the Confirmation Message
- A green confirmation banner will appear at the top of the screen confirming that the payment has been processed successfully.

Tip: Always double-check the client’s Payment History after processing to confirm that the payment was applied correctly.
Tip2: Recommend taking a screenshot of the confirmation message for your records.
Expected Outcome
The client’s scheduled payment will be successfully marked as paid with cash, and their membership will remain active without disruption.
FAQs
Q: What if I entered the wrong cash amount?
A: You will need to cancel the incorrect transaction and reprocess the payment with the correct amount.
Q: Can I process part-payments in cash?
A: No, the system expects the full scheduled amount to be entered to finalize the transaction.
Q: Where do I see the payment reflected?
A: It will appear under the client’s Payment History with a payment method of "Cash."
Need more help? Reach out to our support team via [email protected].

