
 556
556
Overview
This article covers how to update reservation release settings in Hapana Core. Adjusting these settings lets you control when classes or sessions become available for clients to book—either with a rolling or timed release. It's especially useful for managing booking visibility and controlling high-demand sessions.
Prerequisites
- You must have admin access to the Hapana Core account.
- Make sure you are logged into core.hapana.com.
1. Log into your Hapana Core Account
Visit core.hapana.com/login and log in using your credentials.
2. Select your Studio Name
At the top right of the dashboard, click on your Studio Name.

Tip: This opens your studio’s profile configuration area.
3. Click "Account Settings"
From the dropdown menu that appears, select Account Settings.

4. Click "Configuration"
Navigate to the top-center menu and select the Configuration tab.

5. Scroll to the Business Profile section
Scroll down the page until you find the Business Profile section.

6. Click "Edit"
On the right-hand side of the Business Profile, click the Edit button.

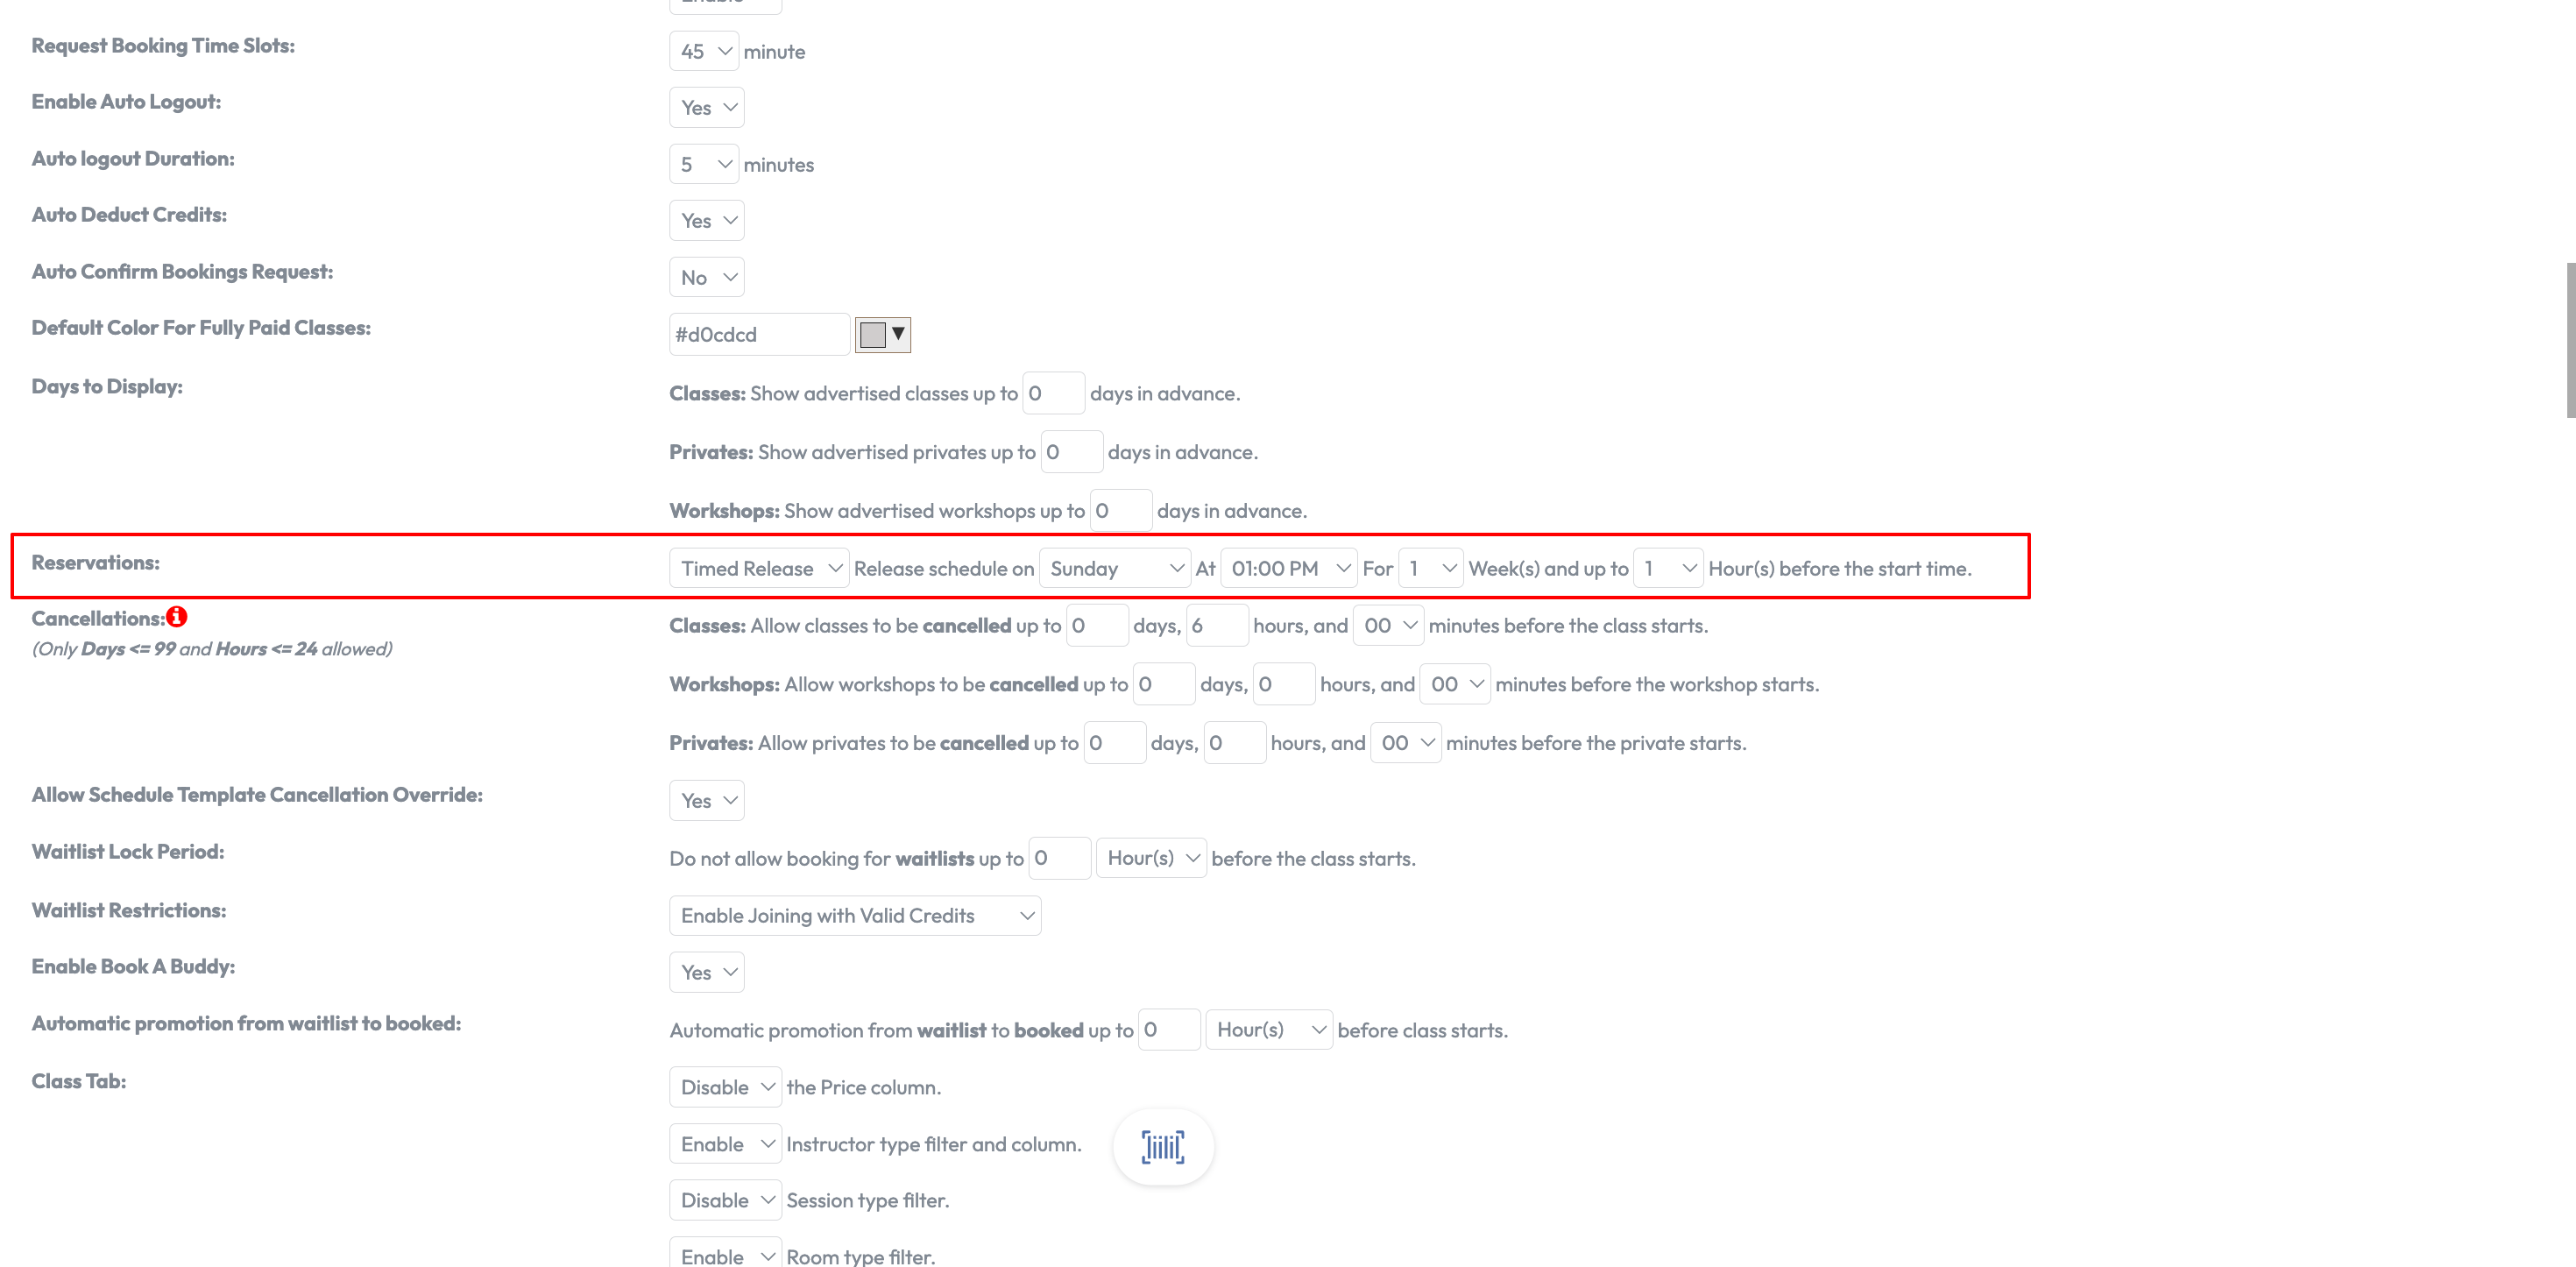
7. Scroll to "Reservations" settings
Within the edit view, scroll down to locate the Reservations setting.

8. Select a release method
Use the dropdown menu under Reservations to choose either:
- Rolling Release
- Timed Release
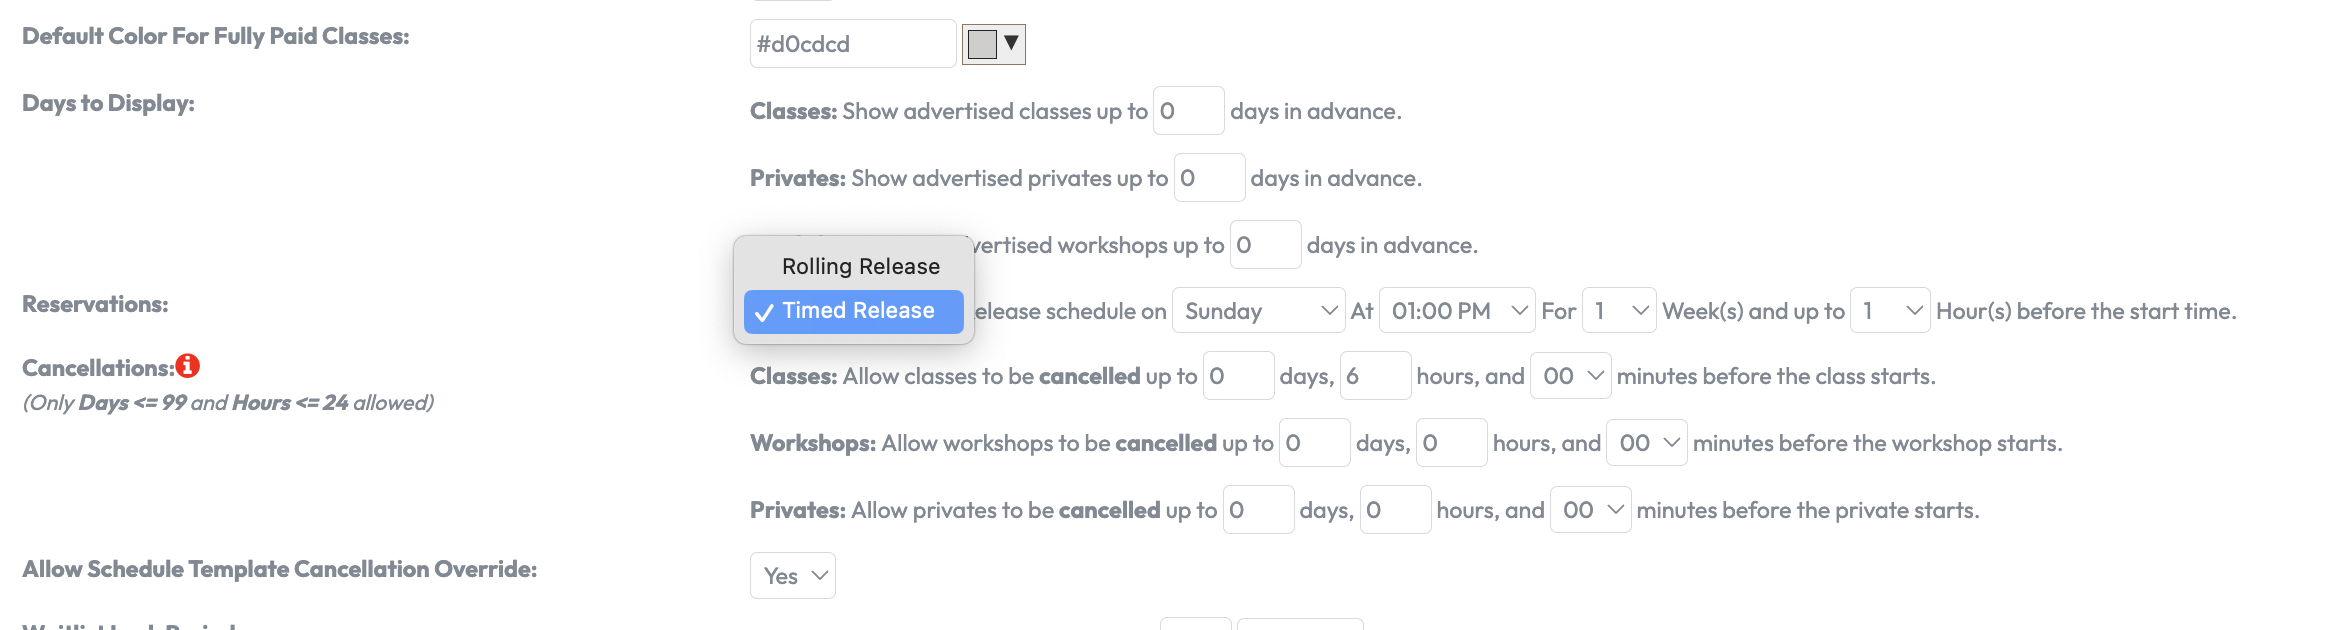
Tip: The selection will determine how and when your schedule becomes bookable.
9. If you select Rolling Release
- Select the daily release time using the time dropdown selection.
- Input a number for the days in advance bookings should open.
- Set the time window using the hours/days dropdowns.

Tip: Set minutes to '0' if bookings should be allowed right up until the session starts.
10. If you select Timed Release
Choose the day of the week, time of day, and booking period using the dropdown menus.
Tip: This setup allows you to release bookings in a controlled batch format each week.
11. Save your changes
Scroll back to the top of the Business Profile section and click Save to apply your new reservation settings.

Expected Outcome
Your session bookings will now open to clients based on the new reservation release settings, either on a rolling or scheduled (timed) basis.
FAQs
Q: What’s the difference between Rolling and Timed Release?
A: Rolling Release opens bookings a fixed number of days/hours before the session. Timed Release opens bookings at a specific day and time.
Q: Can I edit the settings anytime?
A: Yes, you can return to the Configuration tab and make adjustments as needed.
Q: Does this affect all locations?
A: No, the settings apply to the studio you’re editing. Repeat the process for other locations.
For further assistance, reach out to our support team via [email protected].

