You are using an unsupported browser. Please update your browser to the latest version on or before July 31, 2020.
close
This article preview will expire in 30 minutes, after which it will no longer be accessible.
Home > Retail Dashboard and Configurations > Adding Products to POS + How to Sell
Adding Products to POS + How to Sell
print icon

​​​​​​


  1. Select Payments > Retail Configurations, from top menu bar

    Screen_Shot_2018-08-29_at_5.49.16_AM.png
     
  2. Select the POS Inventory Tab on the Left Hand side

    Screen_Shot_2018-08-29_at_5.50.18_AM.png
     
  3. Select ‘Create New’ Button

    Screen_Shot_2018-08-29_at_5.51.07_AM.png
     
  4. Fill in the Information Tab

    Screen_Shot_2018-08-29_at_5.52.30_AM.png
     
  5. Fill in the Variables Tab
  6. Select the ‘+’ icon on the Variables Tab to include each variation of the product
  7. Select ‘Add Product’

    Screen_Shot_2018-08-29_at_5.58.30_AM.png
     
  8. Go to the Payments Tab > Retail Dashboard

    Screen_Shot_2018-08-29_at_5.09.33_AM.png
     
  9. Select ‘New Sale’ on the right hand side
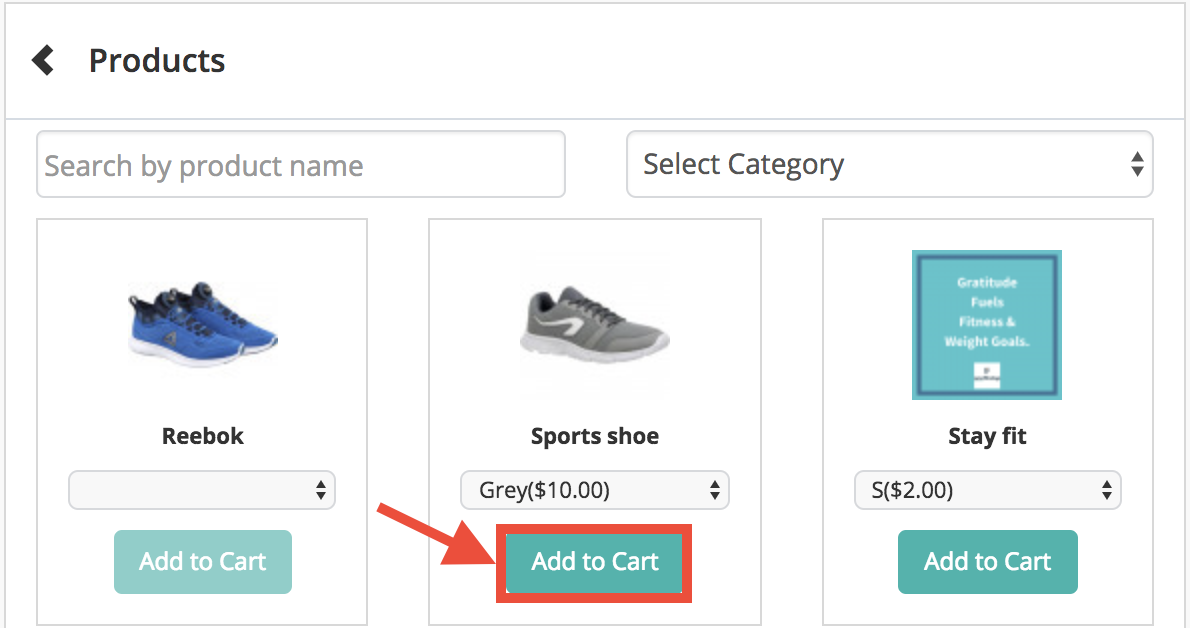
    Screen_Shot_2018-08-29_at_6.01.52_AM.png
     
  10. Select products

    Screen_Shot_2018-08-29_at_6.02.59_AM.png
     
  11. Choose the desired product and ‘Add to Cart’

    Screen_Shot_2018-08-29_at_6.04.02_AM.png
     
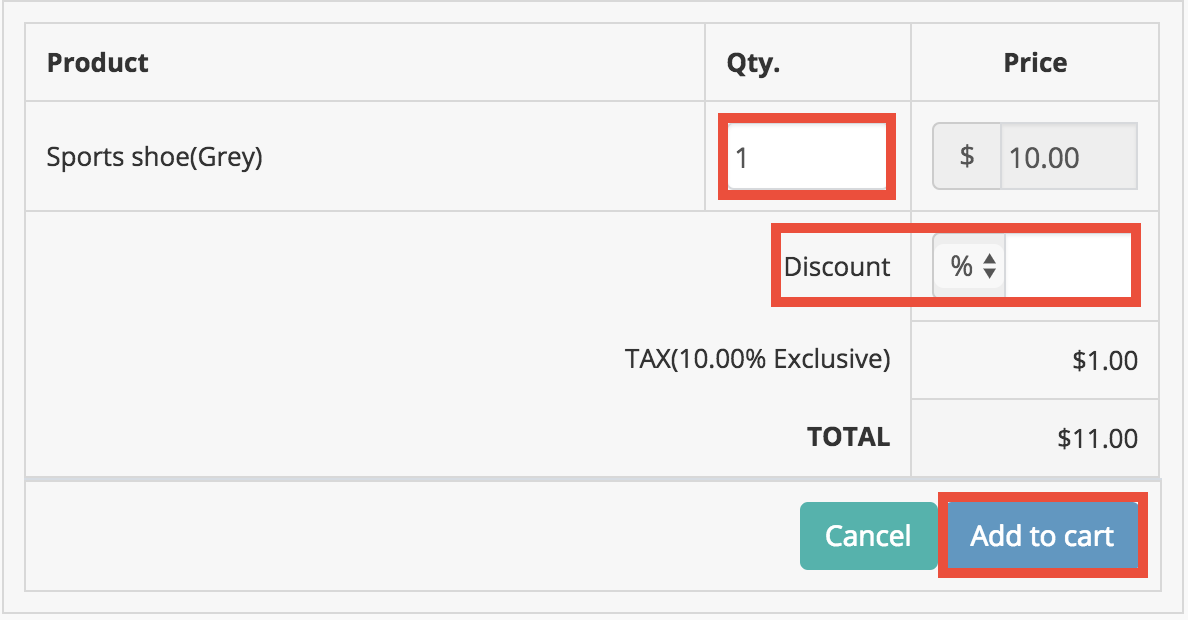
  12. Modify quantity or allocate a discount if necessary and ‘Add to Cart’

    Screen_Shot_2018-08-29_at_6.05.14_AM.png
     
  13. Select client through the ‘+’ icon

    Screen_Shot_2018-08-29_at_6.07.30_AM.png
     
  14. Select ‘Payment Request to Client’ if requesting a payment from the client

    Screen_Shot_2018-08-29_at_6.09.00_AM.png
     
  15. Select ‘Checkout’ button on the bottom right hand corner
  16. Select payment method

    Screen_Shot_2018-08-29_at_6.11.06_AM.png


Feedback
0 out of 0 found this helpful

scroll to top icon