
 1858
1858
Overview
Business operations often require rooms—like treatment rooms, studios, or cycle spaces—to be scheduled and booked like instructors. With the Rooms as Resources feature, you can assign, view, and manage room availability directly in your Hapana Core Scheduler.
Why it matters
Aligning room availability with sessions ensures no double-booking and gives staff better visibility when planning classes and appointments. You can also restrict overlapping usage and define when rooms are available for bookings.
Prerequisites
- Admin access to Core
- At least one active location
- Existing session templates to link room bookings
Step 1: Add and Configure a Room Resource
-
Click your Business Name dropdown > Edit Profile

-
Click Location from the left-hand menu

-
Click the pencil icon beside your location to edit

Step 2: Set Up Your Room
-
Click Add Room

-
Fill in the Room Name (e.g., “Massage Room 1” or “Cycle Studio”)

-
Toggle on Assign Room Resource Booking if you'd like the room to support booking and spot allocation

Tip: This step links the room with reservation mapping. You can set this up under Room Resource Configuration in Edit Profile
-
Set available days and times for the room to appear on the schedule

-
Choose whether to Allow Overlapping Sessions
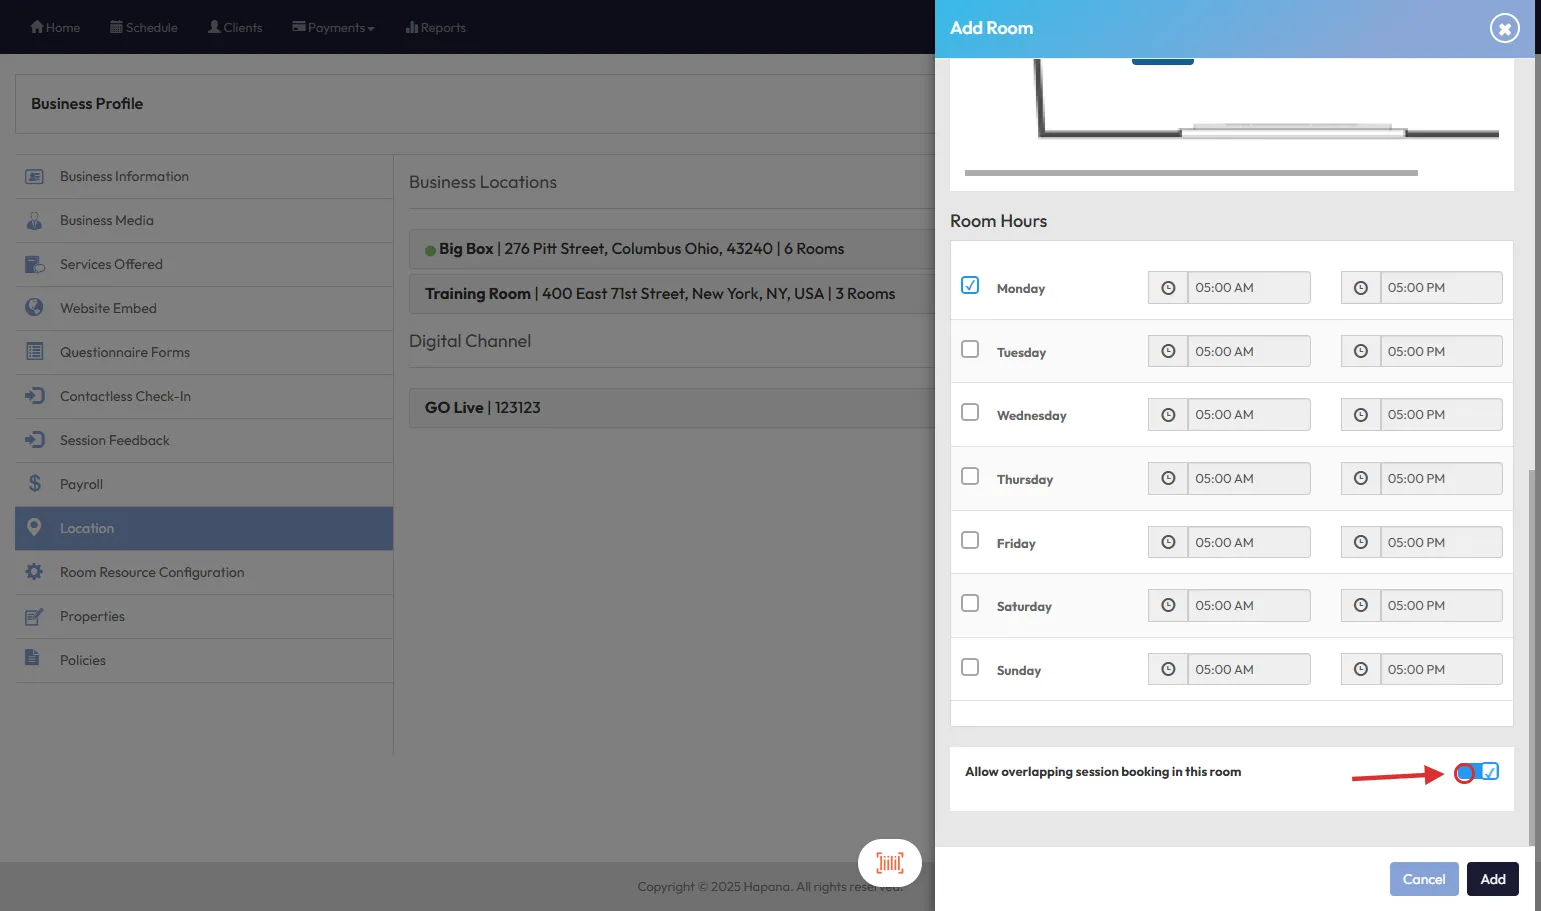
Tip: Rooms with no configured times won’t show on the scheduler and can’t be booked
-
Click Add

Step 3: Enable Room View in the Schedule
To view your rooms on the calendar:
-
Go to Schedule
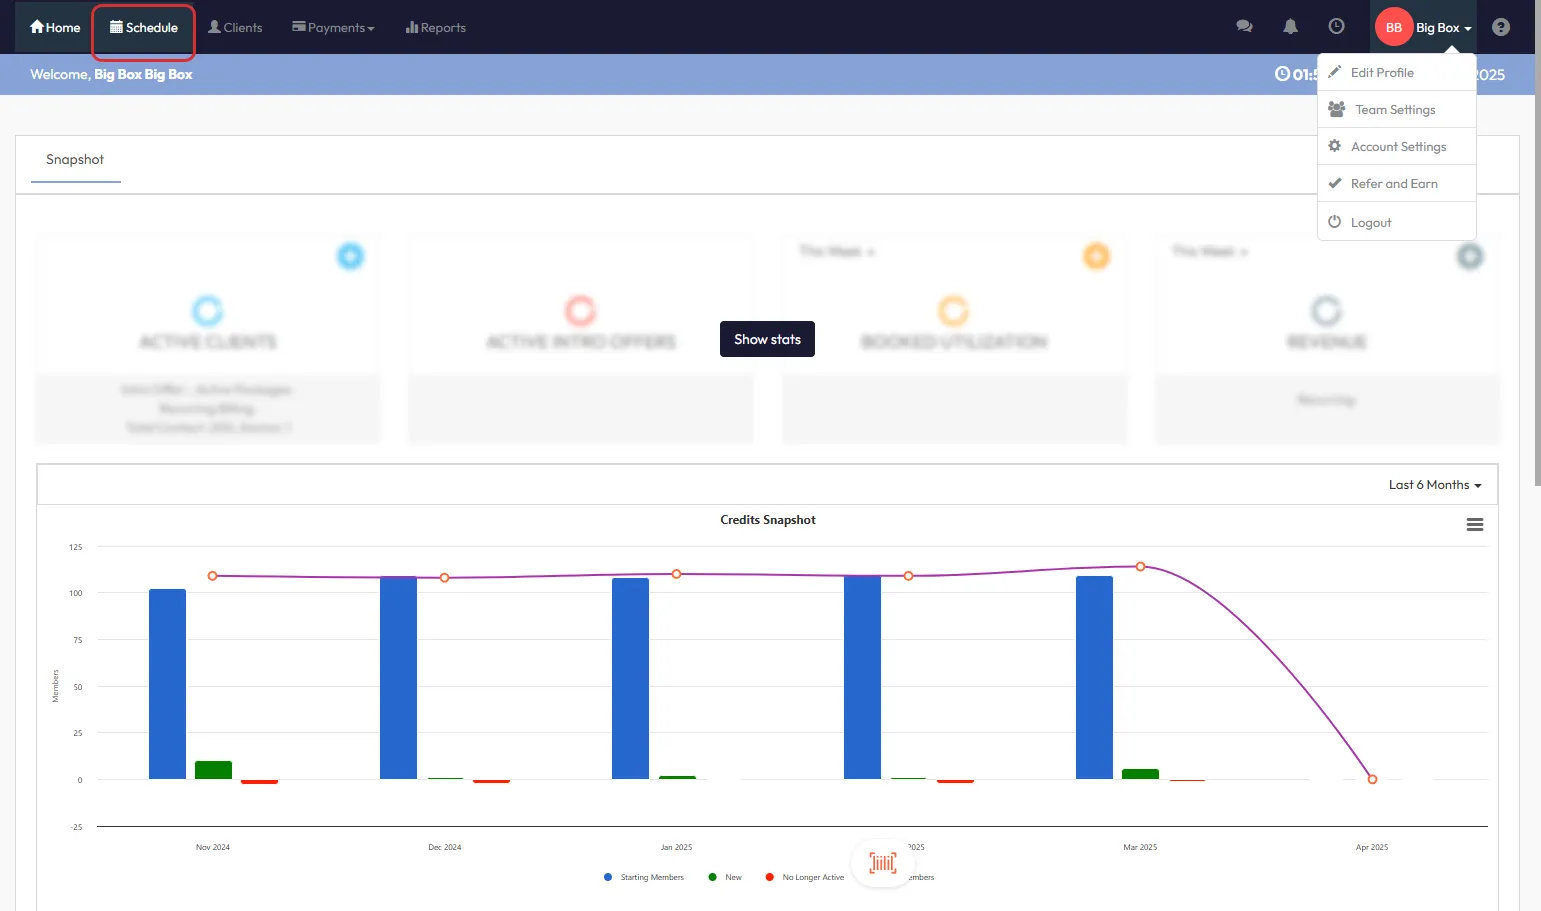
-
Click the gear icon ⚙️ and select Room View

Tip: Room View gives a visual overview of all scheduled room usage
Step 4: Booking Sessions into Rooms
You can now book classes into rooms just like you would with instructors:
-
From Room View, click any open time slot

-
Select a Session Template and the system will pre-fill the designated room

-
Adjust session details, choose clients and click Create

Tip: You’ll receive a warning if you try to book into a room already in use (unless overlapping sessions are allowed)
Step 5: Configure Room Display Options
To control whether empty rooms show in the calendar:
-
Click your Business Name dropdown > Account Settings > Configuration > Business Profile

-
Set "Hide Room From Room View When No Session Booked" to YES to only show active rooms

Default is NO, which displays all rooms regardless of session bookings
Step 6: How Rooms Function as Resources
- Rooms now behave like other resources (e.g., instructors)
- When assigned to a session, the room's schedule is blocked for that duration
- Overlaps are prevented unless explicitly allowed during room setup
- Sessions display room names in both staff and client views for clarity
Expected Outcome
Once configured, rooms can be booked and managed like any other resource, giving teams better control over space usage and avoiding scheduling conflicts.
FAQs
Q: Can a room be booked for multiple sessions at the same time?
A: Only if you've enabled Allow Overlapping Sessions in the room settings.
Q: Can I use rooms without scheduling them?
A: Yes, rooms can still be listed for informational purposes without availability or booking features.
Q: How do I restrict room bookings to specific days/times?
A: Use the room availability settings under Edit Profile > Location > Add Room to define days and hours.
Reach out to our support team via [email protected] if you need help.

